ModSecurity is a web application firewall. It can protect your web application from preying eyes of vulnerability scanners and attackers. It is extremely customizable, and when paired with OWASP’s Core Rule Set, covers quite a lot of web technologies and frameworks.
In this article, we’ll set up ModSecurity on an AWS EC2 Server running Nginx web server.
Table of contents
- Set up Nginx on Ubuntu server
- Set up ModSecurity
- Set up ModSecurity <-> Nginx connector
- Loading ModSecurity module in Nginx
- Set up OWASP Core Rule Set
- Turn on ModSecurity in live mode and test XSS payload
Set up Nginx on Ubuntu server
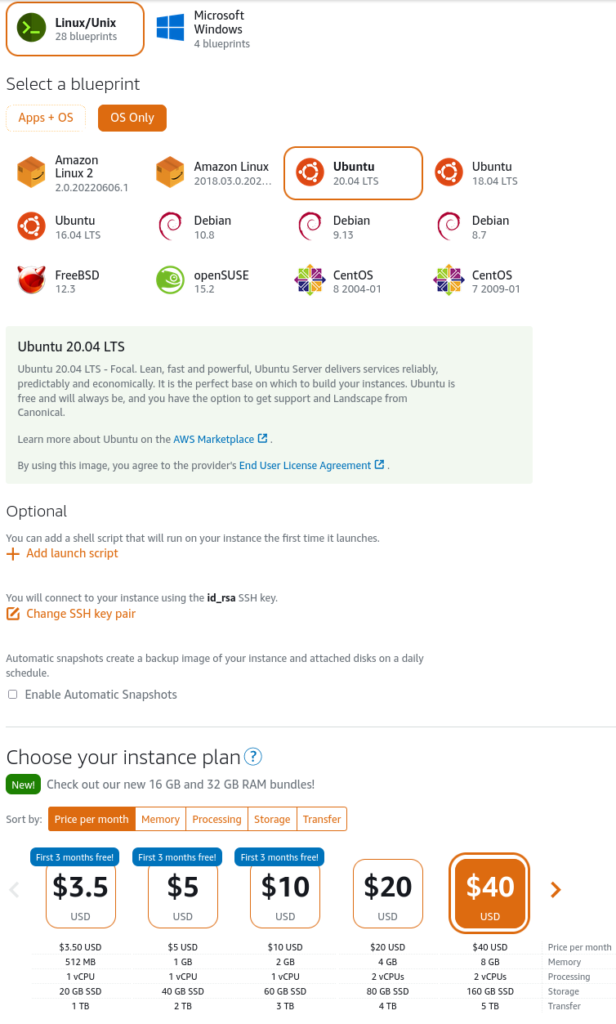
For this tutorial, we’re using AWS LightSail’s Ubuntu image. Choose any instance size depending on your requirements. I’ll choose a 40$ / Month instance with 8GB RAM and 2vCPUs just so that the compilation of ModSecurity is faster.
Once the instance is created, log into the instance with SSH and update packages
$ apt update && apt upgrade -yInstall Nginx
$ sudo apt install nginxCheck what version of Nginx did we get from our package manager. This will be used when compiling Nginx later.
$ nginx -vI got the following output:
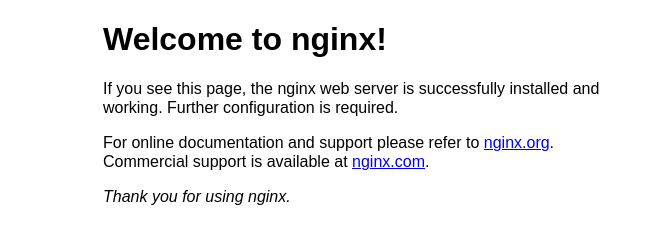
nginx version: nginx/1.18.0 (Ubuntu)To make sure the webserver is successfully installed and running, simply visit the IP address of the server. It should look something similar to this:
Set up ModSecurity
First we’ll need to install compilation and other dependencies.
$ sudo apt-get install -y apt-utils autoconf automake build-essential git libcurl4-openssl-dev libgeoip-dev liblmdb-dev libpcre++-dev libtool libxml2-dev libyajl-dev pkgconf wget zlib1g-dev gitNext we’ll clone the ModSecurity repository into the /opt directory
$ cd /opt && sudo git clone --recursive https://github.com/SpiderLabs/ModSecurity && cd ModSecurityNext we run the build script
$ sudo ./build.shNext we’ll run the compile script that will fetch all the dependencies for the compilation
$ sudo ./configureIt is possible that this command fails and reports you of any dependencies that are still missing. You can simply google them with “install XYZ on Ubuntu” and run the configure command again. Ideally it will just exit without any errors.
Next we start with the actual compilation of ModSecurity
$ sudo makeA reason why I didn’t go with the smallest server was that this step is resource intensive and could take 15 minutes or more depending on your server’s CPU and memory.
If all went through, we can now install ModSecurity
$ sudo make installIf all went through without any errors, we have ModSecurity installed.
Set up ModSecurity <-> Nginx connector
We start off by downloading ModSecurity-Nginx and Nginx source code. Note that the version of Nginx in the next command must match the version installed on our system. For me, that’s 1.18.0 but it could be different for you.
$ cd /opt && git clone https://github.com/SpiderLabs/ModSecurity-nginx.git
$ cd /opt && sudo wget http://nginx.org/download/nginx-1.18.0.tar.gz
Untar the Nginx source. Replace the Nginx version in the next command if needed.
$ sudo tar -xvf nginx-1.18.0.tar.gzNext, we need to grab configure arguments. For that, run the nginx command with a capital ‘V’ flag.
$ nginx -V
nginx version: nginx/1.18.0 (Ubuntu)
built with OpenSSL 1.1.1f  31 Mar 2020
TLS SNI support enabled
configure arguments: --with-cc-opt='-g -O2 -fdebug-prefix-map=/build/nginx-7KvRN5/nginx-1.18.0=. -fstack-protector-strong -Wformat -Werror=format-security -fPIC -Wdate-time -D_FORTIFY_SOURCE=2' --with-ld-opt='-Wl,-Bsymbolic-functions -Wl,-z,relro -Wl,-z,now -fPIC' --prefix=/usr/share/nginx --conf-path=/etc/nginx/nginx.conf --http-log-path=/var/log/nginx/access.log --error-log-path=/var/log/nginx/error.log --lock-path=/var/lock/nginx.lock --pid-path=/run/nginx.pid --modules-path=/usr/lib/nginx/modules --http-client-body-temp-path=/var/lib/nginx/body --http-fastcgi-temp-path=/var/lib/nginx/fastcgi --http-proxy-temp-path=/var/lib/nginx/proxy --http-scgi-temp-path=/var/lib/nginx/scgi --http-uwsgi-temp-path=/var/lib/nginx/uwsgi --with-debug --with-compat --with-pcre-jit --with-http_ssl_module --with-http_stub_status_module --with-http_realip_module --with-http_auth_request_module --with-http_v2_module --with-http_dav_module --with-http_slice_module --with-threads --with-http_addition_module --with-http_gunzip_module --with-http_gzip_static_module --with-http_image_filter_module=dynamic --with-http_sub_module --with-http_xslt_module=dynamic --with-stream=dynamic --with-stream_ssl_module --with-mail=dynamic --with-mail_ssl_module
Note the “configure arguments” in the command’s output. We need to build modsecurity with these arguments.
$ sudo ./configure --add-dynamic-module=../ModSecurity-nginx <paste configure args here>For example, here’s what I’ll run:
$ sudo ./configure --add-dynamic-module=../ModSecurity-nginx --with-cc-opt='-g -O2 -fdebug-prefix-map=/build/nginx-7KvRN5/nginx-1.18.0=. -fstack-protector-strong -Wformat -Werror=format-security -fPIC -Wdate-time -D_FORTIFY_SOURCE=2' --with-ld-opt='-Wl,-Bsymbolic-functions -Wl,-z,relro -Wl,-z,now -fPIC' --prefix=/usr/share/nginx --conf-path=/etc/nginx/nginx.conf --http-log-path=/var/log/nginx/access.log --error-log-path=/var/log/nginx/error.log --lock-path=/var/lock/nginx.lock --pid-path=/run/nginx.pid --modules-path=/usr/lib/nginx/modules --http-client-body-temp-path=/var/lib/nginx/body --http-fastcgi-temp-path=/var/lib/nginx/fastcgi --http-proxy-temp-path=/var/lib/nginx/proxy --http-scgi-temp-path=/var/lib/nginx/scgi --http-uwsgi-temp-path=/var/lib/nginx/uwsgi --with-debug --with-compat --with-pcre-jit --with-http_ssl_module --with-http_stub_status_module --with-http_realip_module --with-http_auth_request_module --with-http_v2_module --with-http_dav_module --with-http_slice_module --with-threads --with-http_addition_module --with-http_gunzip_module --with-http_gzip_static_module --with-http_image_filter_module=dynamic --with-http_sub_module --with-http_xslt_module=dynamic --with-stream=dynamic --with-stream_ssl_module --with-mail=dynamic --with-mail_ssl_moduleDon’t copy the above command. You must use the configure arguments supplied by your installation of Nginx.
Next we build the modules
$ sudo make modulesThis is a compilation step and may take a little while (a minute or so) to complete. The final step here is to copy the compiled modules to a place from where we can reference them from our Nginx config.
$ sudo mkdir /etc/nginx/modules
$ sudo cp objs/ngx_http_modsecurity_module.so /etc/nginx/modules
Loading ModSecurity module in Nginx
Simply add the following line to the nginx config file at /etc/nginx/nginx.conf outside any block.
load_module /etc/nginx/modules/ngx_http_modsecurity_module.so;
Set up OWASP Core Rule Set
OWASP’s Core Rule Set is a set of rules that cover most common frameworks and technologies as well as cover signatures for common web application attack payload. It is a good place to start if you don’t want to write custom rules for many common attacks.
First, we’ll clone the modsecurity-crs repository
$ sudo git clone https://github.com/coreruleset/coreruleset /opt/corerulesetThen we’ll rename the crs-setup config file
$ sudo mv /opt/coreruleset/crs-setup.conf.example /opt/coreruleset/crs-setup.confActivate the default exclusion rule file.
sudo mv /opt/coreruleset/rules/REQUEST-900-EXCLUSION-RULES-BEFORE-CRS.conf.example /opt/coreruleset/rules/REQUEST-900-EXCLUSION-RULES-BEFORE-CRS.confNext we create a place for coreruleset to live within /etc/nginx and copy some additional config files.
$ sudo mkdir -p /etc/nginx/modsec
$ sudo cp /opt/ModSecurity/unicode.mapping /etc/nginx/modsec
$ sudo cp /opt/ModSecurity/modsecurity.conf-recommended /etc/nginx/modsec/modsecurity.conf
Next we create a config file that will include our main ModSecurity config file and CRS setup files.
$ sudo touch /etc/nginx/modsec/main.confAnd add the following lines to the config file.
Include /etc/nginx/modsec/modsecurity.conf
Include /opt/coreruleset/crs-setup.conf
Include /opt/coreruleset/rules/*.conf
Finally, we reference this main.conf file from our Nginx config.
$ sudo vim /etc/nginx/sites-available/defaultAnd add the following line within the server block.
modsecurity on;
modsecurity_rules_file /etc/nginx/modsec/main.conf;
Turn ModSecurity “on” and test XSS payload
So far, we’ve configured everything but if we restart Nginx now, it won’t filter attacks but only detect them since the default operating mode of ModSecurity is to only log malicious requests. To change that, let’s open the file /etc/nginx/modsec/modsecurity.conf and change the line
SecRuleEngine DetectionOnlyto
SecRuleEngine OnFor our changes to go live, we’ll need to restart Nginx.
$ sudo systemctl restart nginxLet’s test our ModSecurity installation. Open your browser and send a sample payload in the GET parameter. It doesn’t have to be a real parameter, but just something that can trigger an XSS filter.
http://[server-ip]/index.html?xss-payload=<script>alert(1)</script>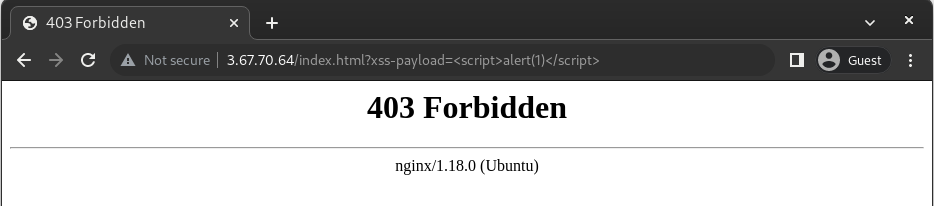
That’s ideal. ModSecurity is working and blocking seemingly malicious requests to our web server. Now any application that sits behind our web server will be protected against many generic web application attacks, even OWASP Top 10 thanks to OWASP’s CoreRuleSet.
In conclusion
It isn’t the most straightforward of installations, but it isn’t very difficult either. The hard part, however, starts here and it is to get rid of all false positives and tweak the installation such that it fits the needs of your specific web application. Depending on how complex an application you’re trying to protect, it can be fairly time consuming.
I’ll write an article on how to tweak the parameters of ModSecurity and make it fit our needs in the future in a separate article.
That’s it for this article, thank you for reading!